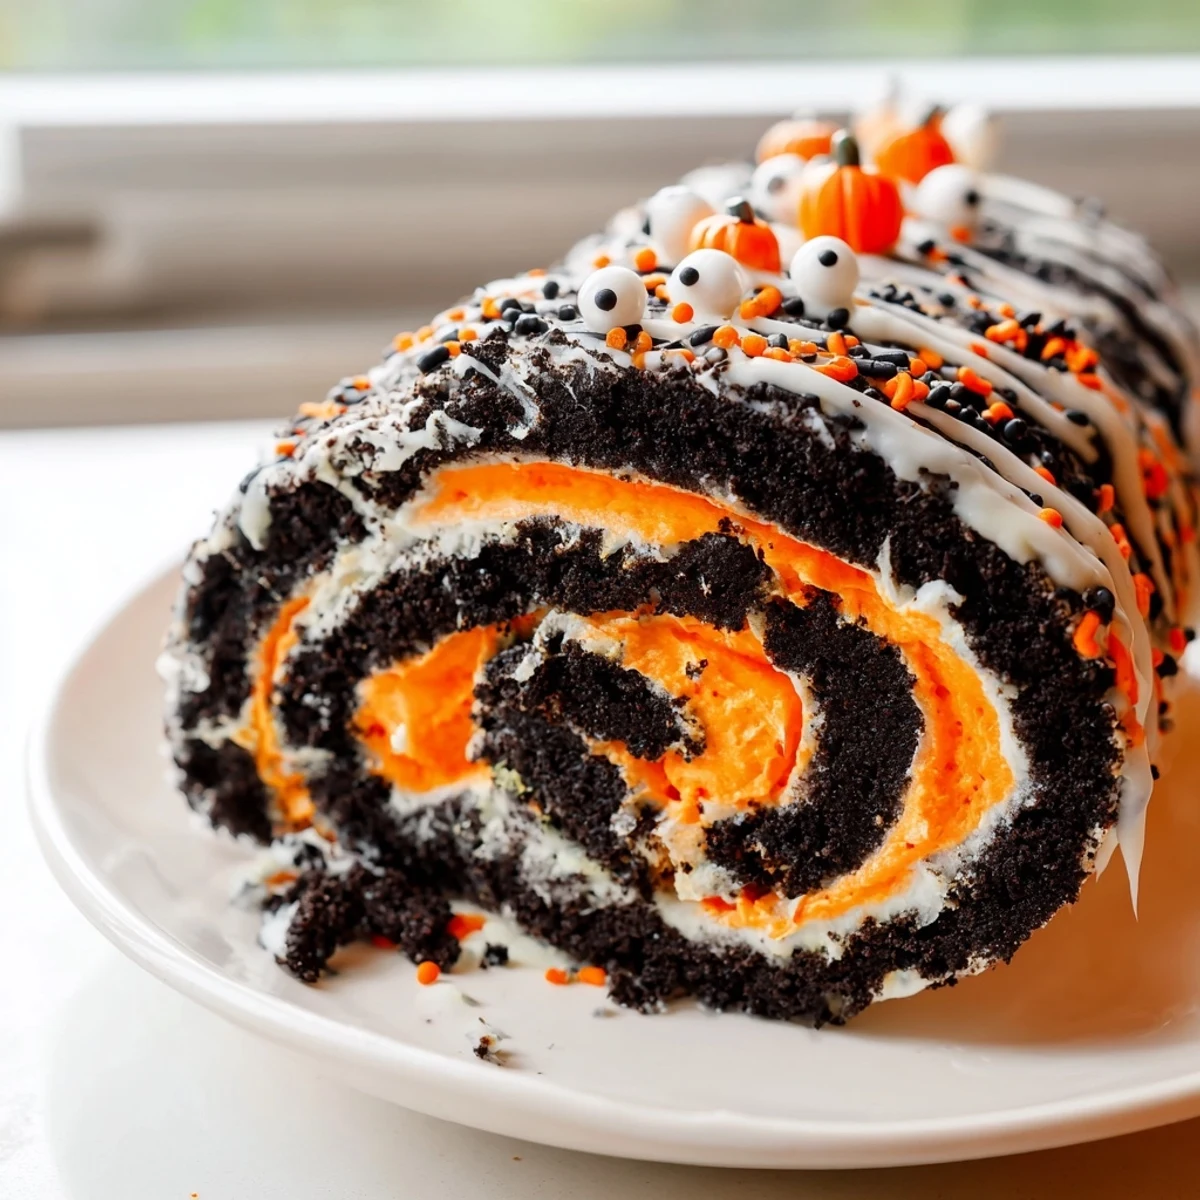
 Pin it
 Create this spectacular Halloween Oreo roll with just 25 minutes of prep time. The no-bake dessert combines crushed Oreos with cream cheese and butter for a rich, cookie-filled base, while the whipped cream filling gets a festive orange or purple tint. After rolling into a log and chilling, the sliceable treat reveals beautiful swirls perfect for any Halloween gathering.
My daughter decided the year we made this that regular desserts were too boring for Halloween. She came home from school talking about spiderwebs and orange swirls, and suddenly we were both elbow-deep in crushed Oreos at 9 PM on a Tuesday. Something about smashing cookies into oblivion is incredibly satisfying, and the way the whipped cream turns this perfect Halloween orange feels like magic every single time.
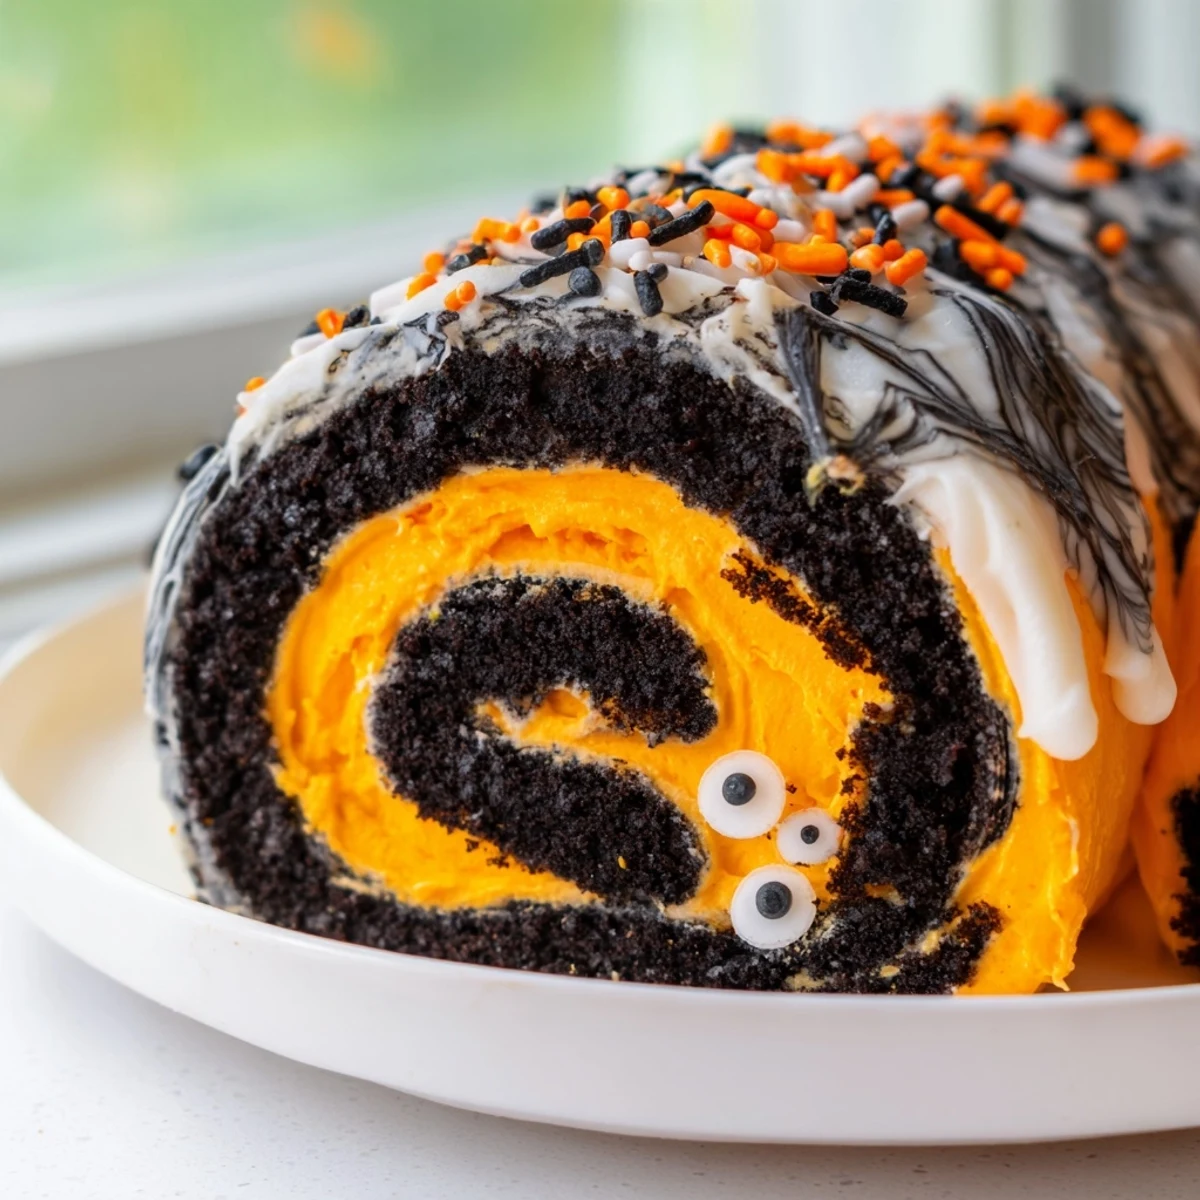
Last October I brought one of these to a friends potluck and honestly forgot about it until someone literally gasped when I cut into the log. The swirl of orange cream against the dark Oreo filling looks so striking that people assume it took hours. My friend's six-year-old stared at it with wide eyes before whispering, did you make this with a witch
Ingredients
- 36 Halloween Oreos: The Halloween ones already have that orange cream center which looks gorgeous when crushed, but regular Oreos work perfectly fine too
- 1 cup powdered sugar: This sweetens the Oreo base just enough so its not overwhelmingly chocolate-heavy
- 6 tbsp unsalted butter melted: Melted butter binds everything together into that perfect press-into-pan consistency
- 4 oz cream cheese softened: Room temperature cream cheese mixes smoothly into the crushed cookies without leaving lumps
- 1 cup heavy whipping cream: Cold cream whips up faster and holds its shape better, so pop the bowl in the fridge for 10 minutes first
- 1/4 cup powdered sugar: Just enough sweetness to balance the rich chocolate base
- 1 tsp vanilla extract: Pure vanilla makes the whipped cream taste like something special rather than just sweetened cream
- Orange or purple food coloring: Gel coloring gives you vibrant Halloween colors without thinning out the whipped cream
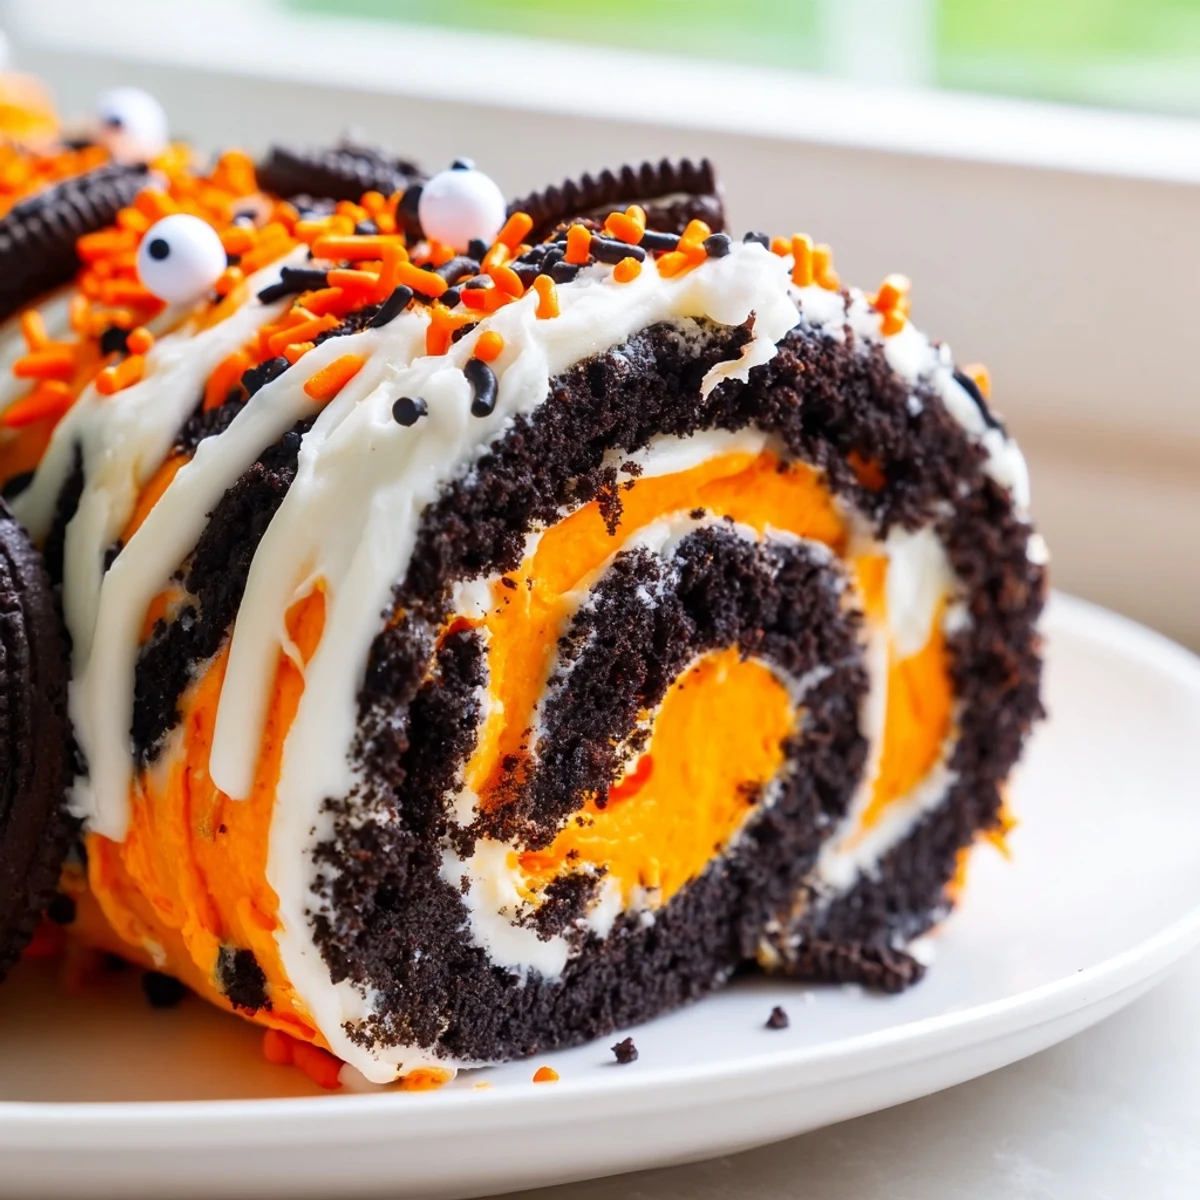
- Halloween sprinkles and candy eyes: These turn a simple roll into something that looks like it came from a professional bakery window
Instructions
- Crush the cookies:
- Pulse those Oreos in your food processor until theyre fine crumbs, or put them in a sealed bag and let your kids smash them with a rolling pin
- Make the Oreo base:
- Mix the crushed cookies with powdered sugar, melted butter, and softened cream cheese until it forms a thick, sticky dough that holds together when you squeeze it
- Roll out the crust:
- Place the Oreo mixture between two sheets of parchment paper and roll it into a rectangle about half an inch thick, making sure its even throughout
- Whip the cream:
- Beat the heavy cream with powdered sugar and vanilla until you have stiff peaks that hold their shape when you lift the beaters
- Add Halloween color:
- Gently fold in orange or purple food coloring until the whipped cream is evenly tinted—start with a little because you can always add more
- Spread the filling:
- Spread that gorgeous orange whipped cream over your Oreo rectangle, leaving about an inch of border on one long side so it doesnt squish out when you roll
- Roll it up:
- Use the parchment paper to help you roll from the filled edge toward the border, going slowly so it forms a tight log
- Chill thoroughly:
- Refrigerate for at least an hour until its firm enough to slice cleanly—overnight is even better if you can plan ahead
- Decorate and serve:
- Drizzle with melted chocolate, pile on sprinkles, add candy eyes, and slice into thick pieces with a sharp knife
 Pin it
 My mom called me mid-roll the first time I attempted this, slightly panicked because the recipe seemed too easy to work. That phone call saved me—she reminded me that some of the best desserts are just simple ingredients treated with a little patience. Now this roll shows up at every October gathering, and watching peoples faces when the first slice is cut never gets old.
Making It Ahead
This dessert actually gets better after sitting in the fridge for a day. The flavors meld together and the texture becomes more cohesive, so feel free to make it the night before your Halloween party and focus on decorations instead.
Color Variations
You can split the whipped cream into two bowls and color one orange and one purple for a swirled effect inside the roll. Its such a small extra step that makes the final slices look absolutely stunning.
Serving Suggestions
Cold slices are best, so keep this on ice if youre serving outdoors. The texture is at its peak when the whipped cream is firm and the Oreo base has had time to set completely.
- Use a warm knife for cleaner slices
- Let it sit at room temperature for 5 minutes before serving
- Have extra sprinkles handy for last-minute touch-ups
 Pin it
 Hope this brings some spooky joy to your Halloween table this year. Theres something magical about dessert thats both playful and delicious.
Recipe Q&A
- → Can I make this Oreo roll ahead of time?
-
Yes, you can prepare this roll up to 2 days in advance. Keep it tightly wrapped in the refrigerator until ready to serve. Add decorations like sprinkles and chocolate drizzle shortly before serving for the freshest appearance.
- → What if I can't find Halloween Oreos?
-
Regular Oreos work perfectly—simply add orange or purple food coloring to the cookie base mixture when combining with the cream cheese and butter. You can also use colored sandwich cookies or add orange zest for extra Halloween flair.
- → How do I get clean slices when serving?
-
Use a sharp knife and run it under hot water between slices. Wipe the blade clean before each cut. The roll slices best when chilled for at least 2-3 hours, so plan accordingly for the firmest texture.
- → Can I freeze the Oreo roll?
-
Absolutely! Wrap the unadorned roll tightly in plastic wrap and foil, then freeze for up to 1 month. Thaw in the refrigerator overnight before adding decorations and serving. Add sprinkles and chocolate after thawing.
- → What other decorations work well for this Halloween treat?
-
Candy corn, crushed orange and black sprinkles, edible glitter, white chocolate spiderwebs, or themed cupcake toppers all complement this festive roll. Candy eyes add a playful touch, while colored chocolate drizzles create dramatic effects.
