
 Pin it
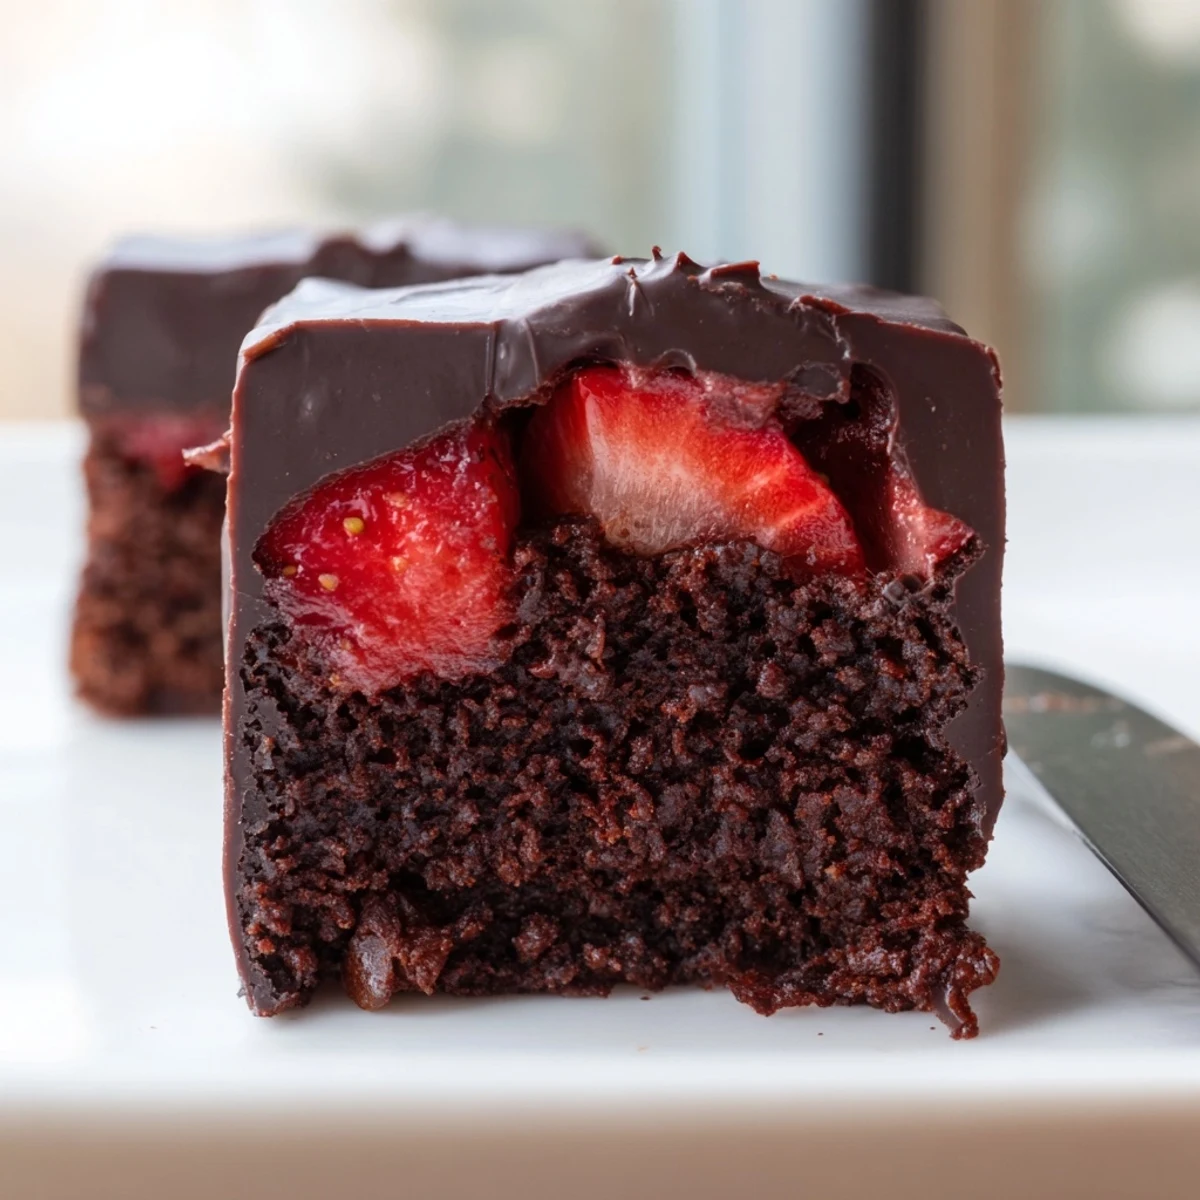
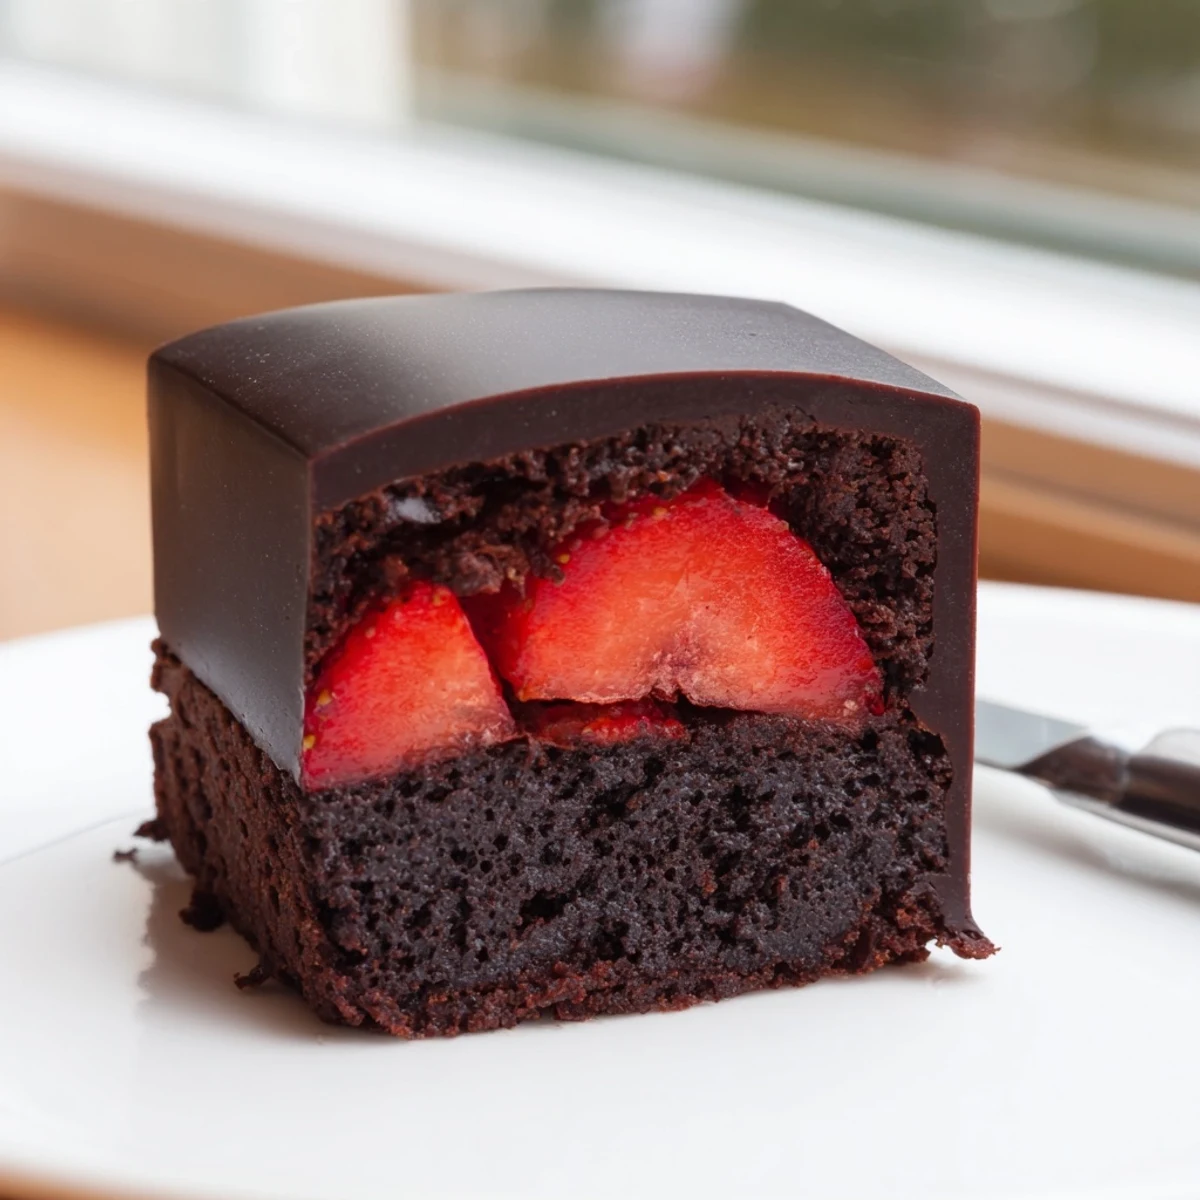
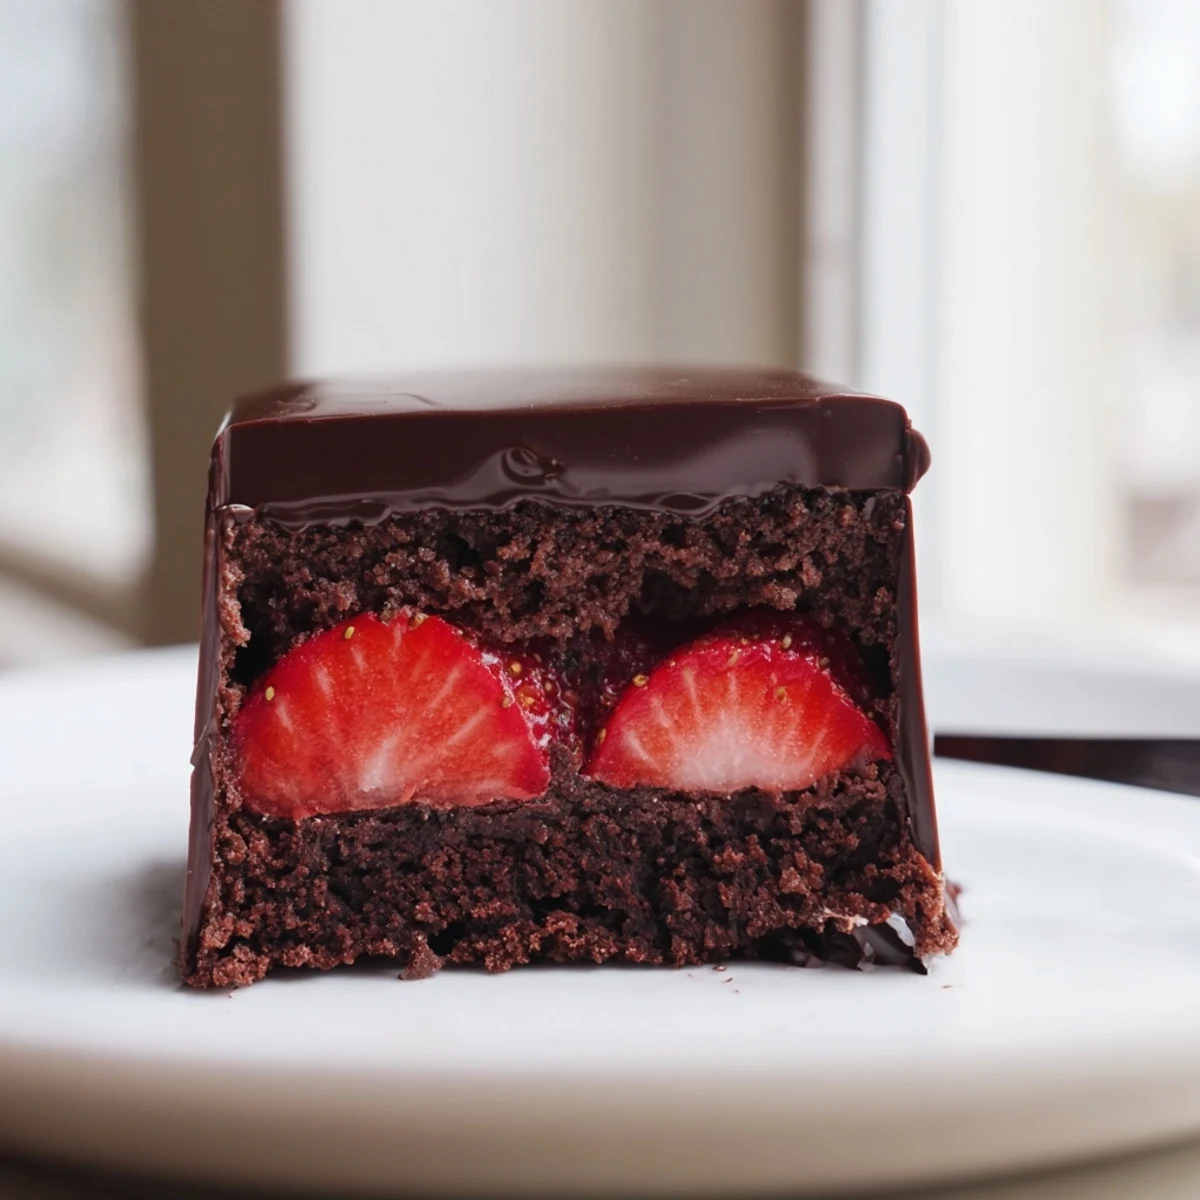
 These chocolate covered strawberry brownies combine three irresistible layers into one showstopping dessert. A dense, fudgy brownie base provides the foundation, topped with vibrant slices of fresh strawberries that add brightness and juiciness.
The whole pan gets finished with a snappy, glossy chocolate coating that seals everything together. After a brief chill in the fridge, they slice into neat squares with a beautiful cross-section of chocolate, fruit, and brownie.
Ready in about an hour with straightforward techniques, they're an impressive yet approachable treat for gatherings, holidays, or an elevated weekend bake.
The kitchen smelled like a chocolate factory had collided with a strawberry field, and honestly, I was not mad about it. My sister walked in, grabbed a square before the chocolate coating had fully set, and declared it the best thing I had ever made. She might have been biased because she was standing there in socks claiming everything was good, but I have made these three times since, and she keeps being right.
I brought a tray of these to a friends potluck last summer and watched people hover near the dessert table pretending to chat while eyeing the remaining squares. One friend quietly asked if she could take the last one home for her husband, then admitted she had already eaten two.
Ingredients
- Unsalted butter (115 g): Use good quality butter here because it forms the entire flavor backbone of the brownie base.
- Semisweet chocolate chips (180 g for brownies plus 180 g for coating): Divide these carefully so you do not accidentally dump the wrong batch into the batter like I did once.
- Granulated sugar (150 g): Gives the brownies their classic sweetness and helps form that slightly crackly top.
- Packed brown sugar (55 g): Adds moisture and a hint of caramel depth that white sugar alone cannot achieve.
- Large eggs (2): Room temperature eggs blend more smoothly into the warm chocolate mixture and give better structure.
- Pure vanilla extract (1 tsp): A small amount that quietly lifts everything without competing with the chocolate.
- All purpose flour (90 g): Measure by spooning into the cup and leveling off to avoid dense, heavy brownies.
- Salt (1/4 tsp): Do not skip this because it sharpens the chocolate and balances the sweetness beautifully.
- Fresh strawberries (300 g, hulled and sliced): Pick berries that smell fragrant at the store because bland strawberries will drag the whole dessert down.
- Coconut oil or neutral vegetable oil (1 tbsp): This is the trick to getting that smooth, snappy chocolate coating that snaps when you bite into it.
Instructions
- Preheat and prepare:
- Set your oven to 175 degrees C (350 degrees F) and line a 22x22 cm baking pan with parchment paper, leaving overhang on two sides like handles for easy lifting later.
- Melt the chocolate and butter:
- Combine the butter and 180 g of chocolate chips in a microwave safe bowl and heat in 30 second bursts, stirring between each, until the mixture is silky and completely smooth.
- Build the batter:
- Whisk both sugars into the melted chocolate until fully blended, then beat in the eggs one at a time followed by the vanilla until the mixture looks glossy and slightly thickened.
- Fold and spread:
- Gently stir in the flour and salt just until you stop seeing dry streaks, then spread the batter evenly across your prepared pan using a spatula.
- Bake and cool:
- Bake for 25 to 30 minutes until a toothpick comes out with moist crumbs clinging to it, then let the brownies cool completely in the pan because patience here protects the strawberry layer later.
- Arrange the strawberries:
- Lay the sliced strawberries in a single even layer across the cooled brownie surface, fitting them snugly together without piling them up.
- Make the chocolate coating:
- Melt the remaining 180 g of chocolate chips with the coconut oil in the microwave, stirring until the mixture is completely smooth and pours like warm silk.
- Cover and chill:
- Pour the melted chocolate over the strawberries and gently tilt the pan in all directions so every berry gets coated, then refrigerate for at least 30 minutes until the top is firm and set.
- Slice and serve:
- Use the parchment overhang to lift the entire slab out of the pan, then cut into 12 squares with a sharp knife, wiping the blade between cuts for clean edges.
 Pin it
 The moment I knew this recipe was a keeper was when my usually dessert indifferent brother in law asked if I could teach him how to make them. That request from a man who once described cake as too sweet told me everything I needed to know.
Getting the Brownie Texture Right
The line between fudgy and cakey brownies comes down to how you handle the flour and the bake time. Fold the flour in gently and stop the moment it disappears because overmixing develops gluten and turns fudge into something closer to bread. Check the brownies at the 25 minute mark because every oven runs differently and a toothpick with moist crumbs means perfection.
Choosing and Prepping Strawberries
Look for strawberries that are red all the way to the stem with no white shoulders because those tend to be sweeter and more flavorful throughout. Slice them about half a centimeter thick so they lie flat and create an even surface for the chocolate coating to settle over. If your berries are particularly juicy, a quick pat down with a clean towel saves you from a slippery separated chocolate layer later.
Storing and Serving Smart
These brownies hold up beautifully in the refrigerator for up to three days when stored in an airtight container, though the chocolate coating stays snappiest on day one. Let them sit at room temperature for about ten minutes before serving so the brownie layer softens slightly and the flavors open up.
- A white chocolate drizzle over the set coating adds a lovely contrast and makes them look gift worthy.
- Swap in dark chocolate for the coating if you want a more intense, less sweet finish.
- Always check your chocolate chip labels if you are serving someone with allergies because cross contamination is surprisingly common.
 Pin it
 These brownies are proof that a little layering turns something already wonderful into something truly unforgettable. Make them once and watch them become the dessert everyone asks for by name.
Recipe Q&A
- → Can I use frozen strawberries instead of fresh?
-
Fresh strawberries are strongly recommended. Frozen berries release excess moisture as they thaw, which can make the brownie layer soggy and prevent the chocolate coating from setting properly. If frozen is your only option, thaw and thoroughly pat the slices dry with paper towels before arranging them on the brownie base.
- → How should I store these brownies?
-
Store them in an airtight container in the refrigerator for up to three days. The chocolate coating helps protect the strawberry layer, but refrigeration keeps everything firm and fresh. Let them sit at room temperature for about ten minutes before serving for the best texture and flavor.
- → Can I use dark chocolate instead of semisweet?
-
Absolutely. Dark chocolate works beautifully in both the brownie base and the top coating. It adds a more intense, slightly bitter edge that balances the sweetness of the strawberries. Use a dark chocolate with around sixty to seventy percent cocoa for the best results.
- → Why did my chocolate coating not set properly?
-
The coating needs adequate time in the refrigerator, at least thirty minutes, to fully harden. Adding coconut oil or vegetable oil to the melted chocolate helps it set with a snappy, glossy finish. Also ensure the strawberry layer isn't overly wet, as excess moisture can interfere with the coating setting correctly.
- → How do I get clean slices when cutting these brownies?
-
Chill the brownies thoroughly before slicing. Use a sharp knife and wipe the blade clean between each cut. Lifting the entire slab out of the pan using the parchment paper overhang makes cutting much easier and results in neater, more presentable squares.
- → Can I make these brownies gluten-free?
-
Yes, you can substitute the all-purpose flour with a one-to-one gluten-free baking blend. Check that your chocolate chips are also certified gluten-free, as some brands may have cross-contamination. The texture will be nearly identical when using a quality gluten-free flour blend.